This project has been on my mind for a long time. Ever since the pattern for the “Daphne” knickers from Violette Field Threads arrived at the store, I have been planning how to make them. If I had known how easy this project was going to be, I would have done this one sooner. For this project, I picked a fabric from the Amy Butler: Belle Collection called ‘French Wallpaper” (Of course, we carry this fabric at Five Eighth Seams :)).
This pattern surprised me a lot when I opened up the pattern pieces because I realized that it has ONLY 3 pieces to cut (Awesome!!). You begin by cutting out your pattern pieces and then pinning them to the fabric according to the instructions. Once you have the fabric cut out, you are ready to begin sewing the front and back of the knickers together. As usual, right sides need to be together and use the 1/2” seam allowance as directed by the pattern instructions. Pay close attention to this part, as you are not sewing the entire length of each side. Finish your edges by serging or using a zigzag/overcast foot on them.
Next, you will need to turn the fabric in order to reposition better. You want the front seam to be facing you. At this point, you can pin and stitch the two inseams. This step will create the legs of the knickers. Your project should be taking form nicely.
After you reach this point, you will begin adding all the nice details to your knickers that will really make your project unique. Add a single-fold bias tape to the keyhole notch on the side of each leg. Make sure you buy single-fold bias tape, as there are different kinds available. If you are feeling creative, you can always make your own bias tape. This process should be a fairly simple step for everyone.
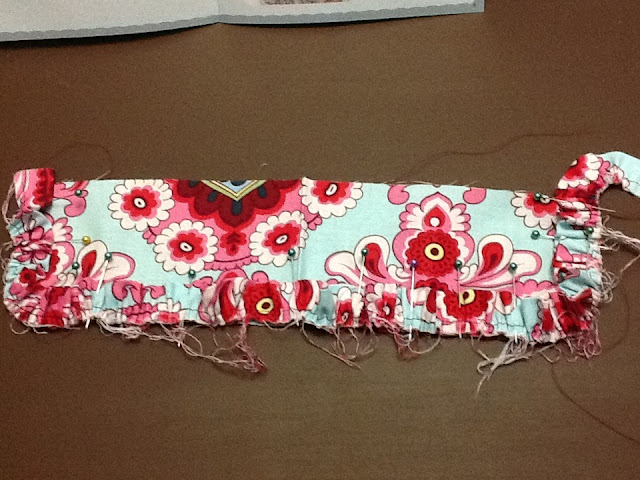
Now you will need to create the ruffles for the outfit. You have many options for this as well. You can use the same material as the main body or use contrasting fabrics. It is totally up to you. However, you need to follow the guide in the instructions for determining the length of fabric you will need to create the ruffles for your project. Once you have this length established, you will fold the material in half lengthwise and press it. Run a basting stitch about 1/4” away from the raw edge. At this point, you will pull on the ends of the basting stitch to take up about half of the length of the ruffle material. Next, you will place the ruffle on top of the cuff and pin it in place, right sides together. Sew the ruffle on to the cuff using a 1/4” seam allowance. Add the second cuff piece to the ruffled cuff like you are making a sandwich with lettuce. Sew it all together and turn it right side out. Repeat this step one more time for the other cuff. Remember to make your cuffs as similar as possible.
Once your cuffs are finished, you can attach them to the legs of the pants. You may want to line up both legs & cuffs before you stitch them in place in case you want to adjust them. Also, make sure your cuff extends past the keyhole edge of the knickers by about a 1 inch on each side. Finish all your edges, fold down, iron, and topstitch.
Now you will create ruffles once again but for the waistband at the top of the knickers. Just like before, follow the guide. Attach the ruffles to the top, pin in place, and run a 1/4” stitch to secure them to the pants. At this point, you will make your waistband by sewing the two pieces together at the short sides. Place this waistband over the knickers with right sides together. Make sure you are aligning the side seams of each part. Pin it in place. Similar to the cuffs, you will sew the waistband in place, turn up, iron, and run a nice topstitch.
Continue on with the waistband to make the casing for the elastic waistband. I would like to note something about the instructions. The directions tell you to position the elastic in the front part of the waistband. However, I did not feel this way would look very good once the knickers were finished. So, I decided against this direction and positioned my elastic in the back of the waistband. I think it improves the look, but you can do what ever you prefer.
Once you have completed the steps for adding your elastic to the waistband, you only have to add the finishing touches to your outfit. You will line up your cuffs and add the buttons to them. You can get really creative with your buttons. I chose to use buttons that matched the keyhole bias tape since this part was already a contrasting color.
Congratulations! You have finished your new knickers. I enjoyed making this project, and I really like the finished product. My daughter loves them also and will be wearing them on her trip to South America this week.
Enjoy!! See you in my next blog :)


ReplyDeletesavannah cat for sale
savannah kitten
f1 savannah cat for sale
savannah cat price
savannah cats for sale
savannah kittens for sale, serval cat for sale, savannah cat for sale, savannah cats for sale, f1 savannah cat for sale, serval cat for sale, exotic cats for sale, f1 savannah cat, f4 savannah cat, cats for sale, savannah cats, Serval kittens for sale, savannah kittens for sale near me, savannah cats for sale near me, bengal kittens for sale, bengal kittens for sale near me.